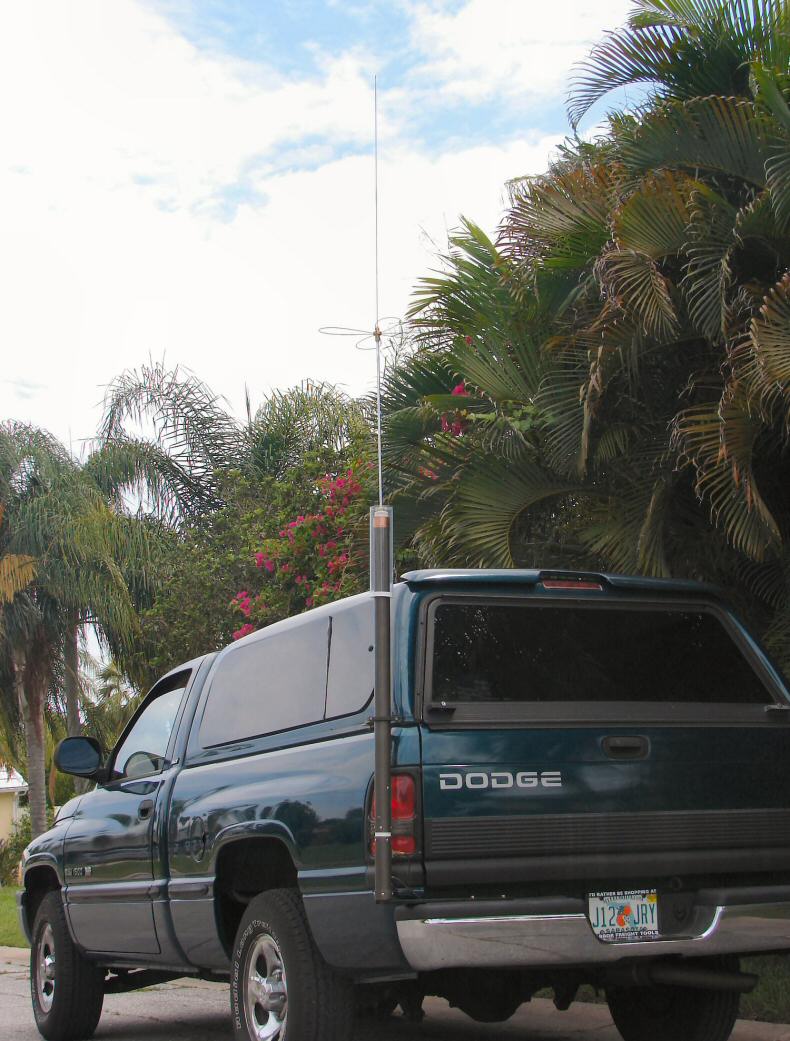
 My subdivision has severe restrictions on outdoor antennas (such as none allowed), which makes it difficult to put up much of an antenna for Amateur use. At the moment I'm between antennas here, trying to devise something that will get out, but not attract a lot of attention. The electrical noise (QRN) here is bad, so the home antenna will have to be horizontally polarized and directional to be usable. I know, "lots of luck, Ken" . . . As a consequence, I've had to restrict operations primarily to the mobile of late. I live on the West Coast of Florida, and hurricanes are always a threat. It's wise to prepare for emergency operations, which is a big part of hurricane preparedness. The mobile rig can really help out, especially if it's an effective communications platform. I decided to build a better antenna for the mobile, where I'd been using simple Hustler whips and other less-than-efficient designs. I'm also developing plans for emergency power in the truck, which will be the topic for another web page when I get to it! I decided to build a basic screwdriver antenna for the mobile, patterned after the original DK3 introduced by Don Johnson, W6AAQ back in 1991. This is a multiband antenna which is tuned by a gear-head motor, ultimately refined to operate from the internal workins' of a common powered screwdriver - Hence the name. This is my takeoff on the antenna - Heavy copper tubing, bigger size, large capacity hat, large beryllium copper fingers, and I don't mind drilling holes in my vintage Dodge . . . Enjoy the photos.  This photo shows the lower mast section, the coil, and the power drive assembly for the antenna. The power screwdriver is a Black & Decker unit that cost $18 at Lowes. The resistor in series with the motor has since been moved to the controller in the cab of the truck, and the wiring replaced with 2 conductor #20 shielded cable. Note that the lower mast is in 2 pieces, a short grounded bottom section, and a 3-1/2' upper section. They are separated by some PVC that I turned to fit snugly into the mast pieces as an insulator. 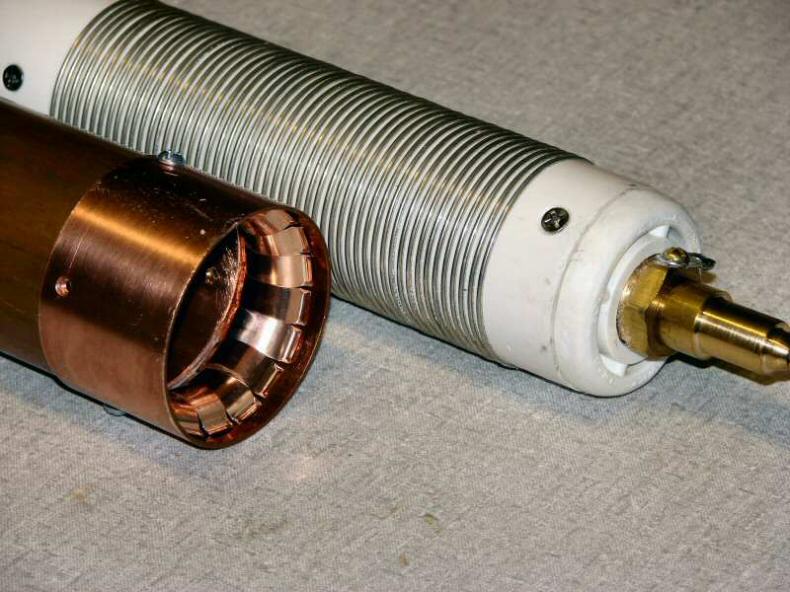 A close-up of the coil and beryllium fingers that contact the coil as it retracts into the antenna mast. The coil is wound onto a schedule 40 PVC pipe into which I cut the coil grooves on my small (Sherline) lathe. It limits the antenna to 40M at the low end, because an 80M coil would be 3 times as long - This was the max length I could fit into my lathe! As it is, it will tune from 40M (actually 6.5 MHz) up to 6M, a little less when I have the capacity hat installed. I soldered the beryllium fingers into a 2" copper pipe coupling, and secured it with screws to the mast. This enables me to change the fingers without too much effort if they wear out over time. Everything is slathered in silicone grease before assembly. 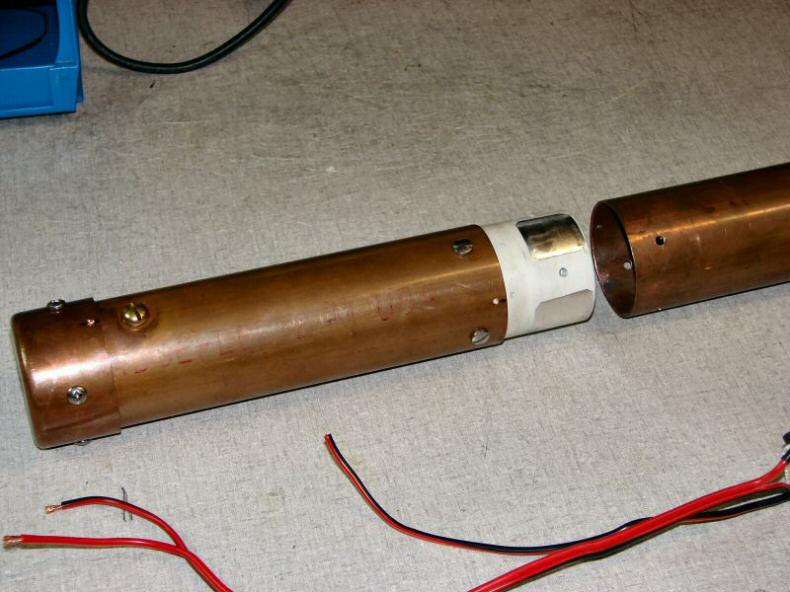 The mounting base of the antenna, before I mounted the SO-239 connector. I soldered brass nuts into the base to accept the bottom 3/8-16 mounting screw and smaller 1/4-20 ground screw - you can see a 1/4-20 brass machine screw screwed into position ready for the strap to the frame. 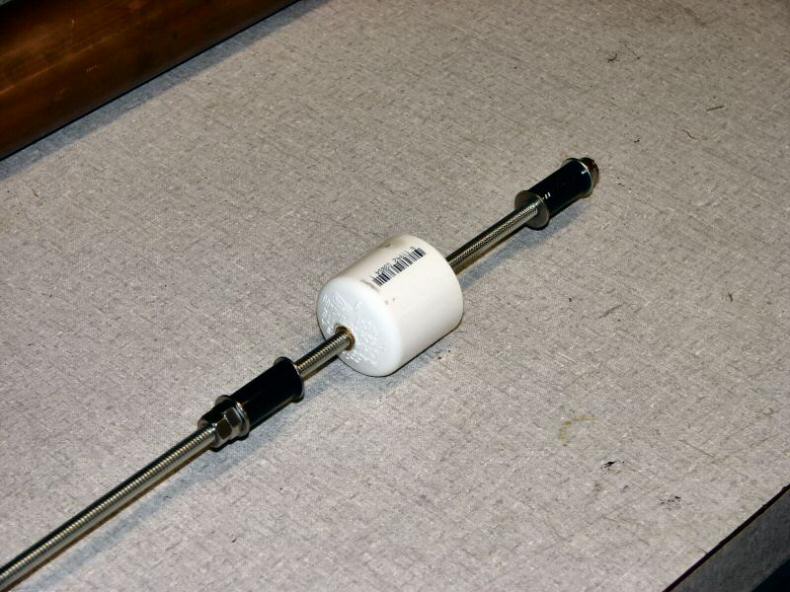 A close-up of the coil drive with Don Johnson's originally suggested clutches comprised of some rubber tubing and washers. When the coil reaches end of travel, it starts to spin. This looks pretty cool with the capacity hat installed! 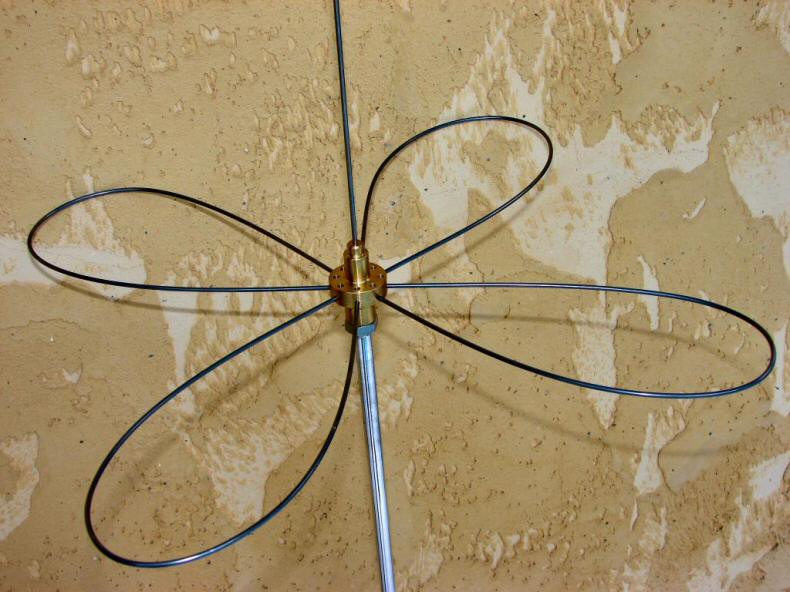 The assembled capacity hat - I turned a brass hub to hold the steel wire pieces, and attach to the short lower support mast and upper whip. The short mast is a piece of 3/8" aluminum rod that I threaded at each end and polished. The wires are music wire, I'll have to replace them with stainless steel wire when I can find some. 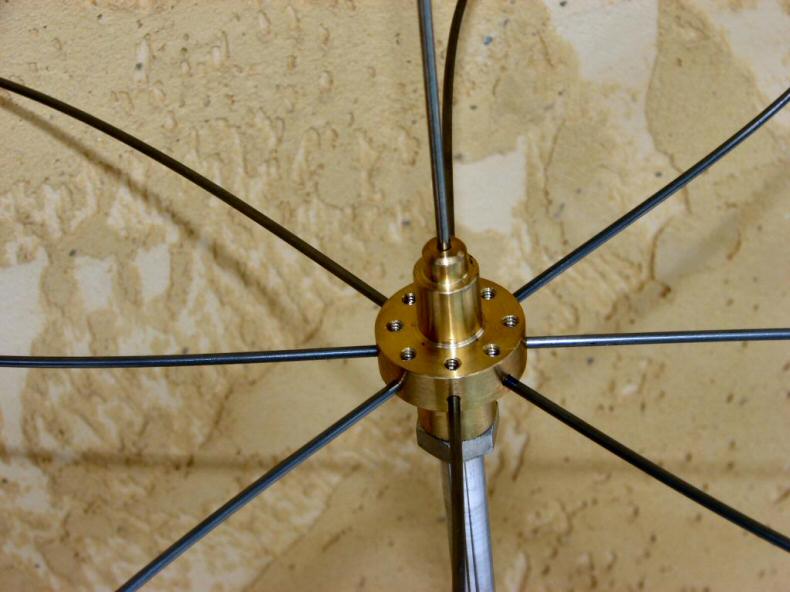 Close-up of the turned brass hub. Next time I'll skip machining a whip holder onto it, and just include a tapped 3/8-24 hole instead. It will make it more versatile. 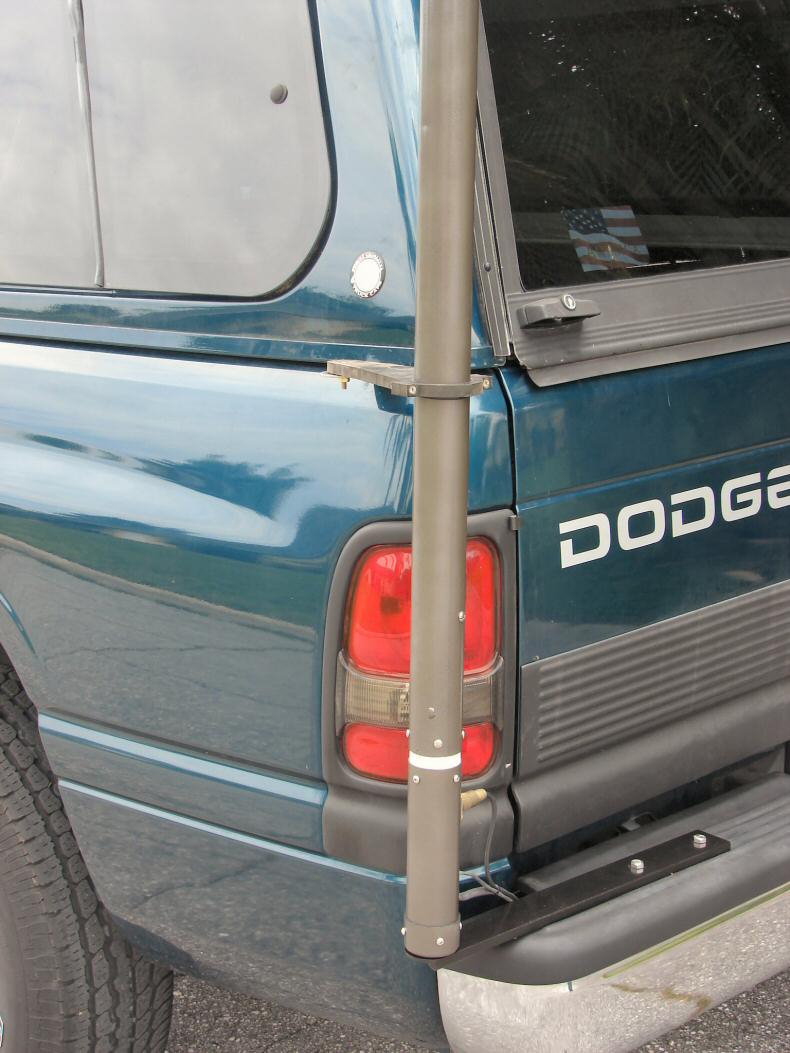 Detail of the mount(s) to the truck. I screwed a steel U-channel onto the bumper, and attached an upper clamp about 2 feet up to keep it steady. The upper clamp is made from a white plastic breadboard, dyed black. The copper pipe was primed and then painted with Rustoleum hammer finish enamel - Awesome paint that I've been spraying on all sorts of projects! |